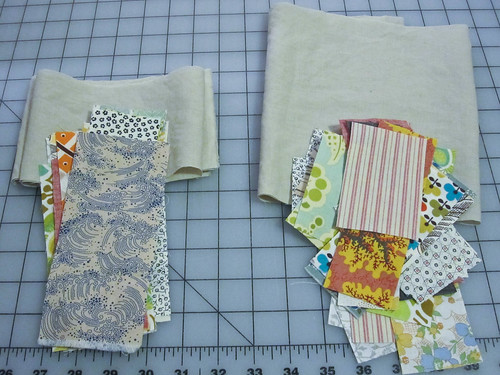
The fabric is in the mail! I will admit that I just went through my stash pulling what I thought might work, then pared it down. I did have a panic moment where I thought things looked a hot mess, but I think the fabrics work together. I ended up picking soft blues, greens, yellows, and reds with punches black. There are a few pieces that I would like for you to definitely use: black linen, red linen, red/orange argyle. Please pull from your scraps if you have something that would look good. :) Solids or prints are fine. Also, please send back any unused linen.
I'm going to make these into a queen sized quilt, approx. 83" x 96". I would like for each person to make a row (83" wide) or as much of a row as you can stand making! I know 83" is a lot and I will be very happy with whatever you send me. :)
I'm ok with a little wonkiness, but please try to make your blocks as square (90 degree angles) as possible.
In your package you should have 1 piece of linen that is 8" x 23", one piece of linen that is 8" x 46", and lots of little rectangles.
*These directions have been included with your fabric, but a few points have been changed slightly and it won't make a difference which directions you use*
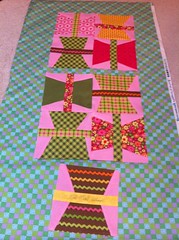
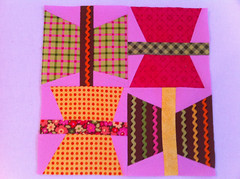
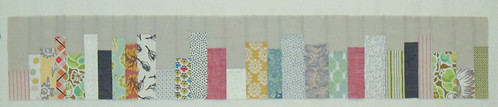
The "block"
finished size: 8.5" x between 40" and 83"
1. Take your linen (8" x 46") and cut it in half so that you have 2 pieces that are 8" x 23" (3 total).
2. Take one of the 8" x 23" pieces and cut it in half so that you now have 2 pieces that are 4" x 23"
* We are going to be working with 2 sets: tall color pieces (that use the linen from step 2) and short color pieces (that use the linen from step 1).
3. Look at your cotton fabrics. You may want to set some aside to be tall and take others to be shorter pieces (cut them as you see fit). The ones I sent you are between 1.5"-3" wide and 4"-7" tall.
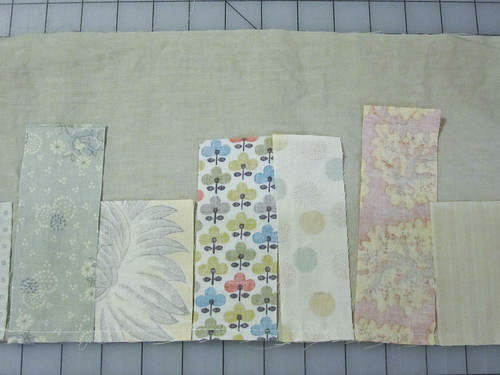
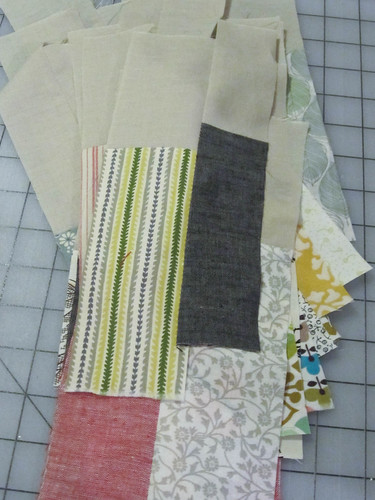
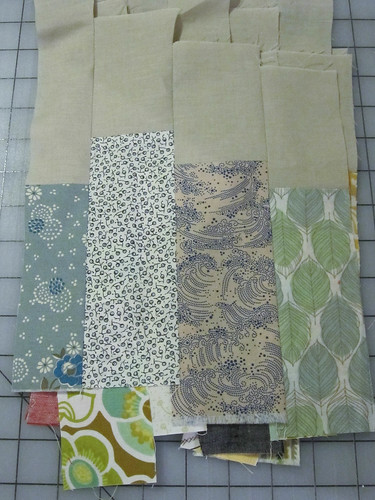
4. Take the shorter pieces (under 6" tall) and sew them to the 8" linen in a string piecing method (see picture). It's best if your pieces are touching, but not overlapping.
5. Repeat with your taller pieces (6" or more) and the 4" tall linen.
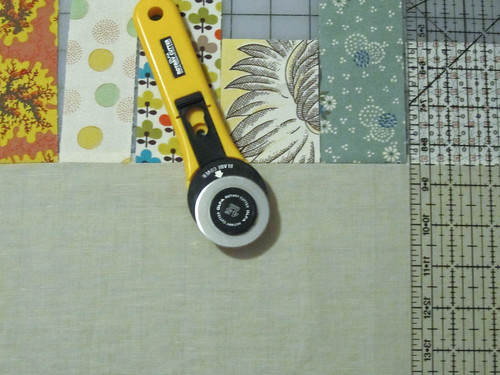
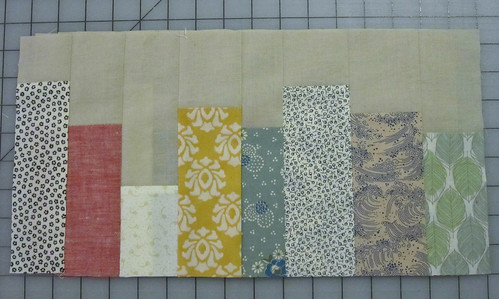
6. Press seams toward cotton. Use your rotary cutter & ruler to trim them apart.
7. Now take any 2 (perhaps a tall & short?) and place them right sides together. You're going to want to make sure that the horizontal seams DO NOT line up. Sew. Press seam however you like. Repeat...
8. Sew together 2 pairs. Press seam. Repeat...
* Once you have about 8 pieces sewn together (about 18" wide) you're going to trim it to 8.5" tall. It's easier to trim now than at the end.
10. Sew together these trimmed blocks, this time making sure that the top & bottom are aligned.
11. Repeat until you have a row! Or until you are burned out! :) I made it to about 50" wide in just over an hour (with documentation).
I am very happy with how this is looking! I made a collage in Photoshop, but I'm not going to share it because I want to final quilt to be a surprise!
Siggy block
So this may sound strange: I want you to sign one of the cotton fabric pieces in your row. It can have a print or be a solid. Be one of my fabrics or yours. Big or small.