Tuesday, February 22, 2011

Spider web quilt


This one will be my favorite yet...


And we are making it for this sweetie:


Don't you think he needs a nice heavy quilt? It is COLD here in Kansas...

He actually has several quilts, but none are as big as this one will be.

Monday, February 21, 2011

Lovely Linen Bee March


Lovely Linen Bee March
Originally uploaded by nkiblueeyes
Here's a sneak peek... I'm going to make up a few of these to post pictures of... Will work more when the kids go to bed!

I'm so excited!

March's Inspiration

My great grandmother made this scrappy spider web quilt. With your help, I'm going to attempt to recreate it in a different color scheme. We'll use cool colors and lots of my scraps along with some Essex Cotton/Linen blend in aqua. I'm working on the final touches on your packets and in the next day or so I will hopefully be able to get them in the mail.

This quilt is pieced on the diagonal. 12 inch blocks are set on point. This method will be different than most of the tutorials I've seen online and will result in a bigger web and a bigger quilt. :)

More details are soon to come!

For Ali.

Here it is Ali, I had to take the photo whilst they were in 5 pieces as they wouldn't have fit other wise but they are all together now.
I added some Neptune by Tula Pink and some Frolic by Sandy Grevais I hope that's ok.
I will pop them in the post tomorrow.
I really enjoyed putting it together.

Oh by the way I have a little giveaway over at my blog if you'd all like to go and take a look.
Just click on Tracy's Blog on the right.

Friday, February 18, 2011

I can't wait until August :o)

I thought I'd give a sneak peak to what I plan for August, when it's my turn to pick the block.  I love the wonky log cabin tutorial that John, aka Quilt Dad has created.  I think these are tiny napkins?  but they are hand embroidered and are linen.  They will make fantastic centers to the log cabin blocks.  Don't ya think?

~Kristy

Jan & Feb blocks for group 2


I've just finished both my January and February blocks for group 2.  This was my first experience working with linen and I've found a new love!  January's blocks belong to Chris/lightbluequilt.  We used the fabulous wonky star tutorial from over at Silly BooDilly.  It is one of my favorite blocks to make, as you can see in my flickr photostream.  

February's block belongs to Franswimmer and we used a great Dutchman's Puzzle tutorial over at Modify Tradition.  I like the option to waste some fabric when making flying geese, simply because I'm a perfectionist and any other way I've tried to make them turns out in disaster.

~Kristy

Saturday, February 12, 2011

For Alexandra in the Lovely Linen Bee

This block was so much fun. I love the simplicity of it, the way you trim as you go (minimizes mistakes and makes everything uniform) and the way your eye is drawn across the blocks. So stunning!

Thanks for the fabulous idea, Alex! I started cutting into my scraps today to make my own, although I might use a solid cotton or flannel instead of linen. Not sure yet...

Wednesday, February 9, 2011

A strip for Alexandra

Alexandra is going to have a beautiful quilt from the strips that Linen Bee 1 are making for her. This was the first time I have made this block/strip. I think it will make a beautiful quilt for her bed. I look forward to seeing it done. Great choice Alexandra!!

Sunday, January 30, 2011

Group 1 - February

The fabric is in the mail! I will admit that I just went through my stash pulling what I thought might work, then pared it down. I did have a panic moment where I thought things looked a hot mess, but I think the fabrics work together. I ended up picking soft blues, greens, yellows, and reds with punches black. There are a few pieces that I would like for you to definitely use: black linen, red linen, red/orange argyle. Please pull from your scraps if you have something that would look good. :) Solids or prints are fine. Also, please send back any unused linen.

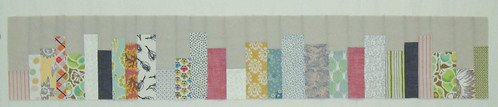
I'm going to make these into a queen sized quilt, approx. 83" x 96". I would like for each person to make a row (83" wide) or as much of a row as you can stand making! I know 83" is a lot and I will be very happy with whatever you send me. :)

I'm ok with a little wonkiness, but please try to make your blocks as square (90 degree angles) as possible.

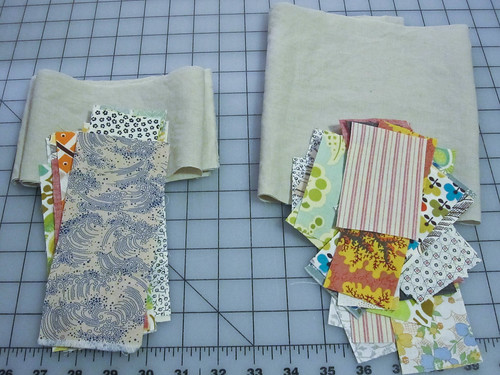
In your package you should have 1 piece of linen that is 8" x 23", one piece of linen that is 8" x 46", and lots of little rectangles.

*These directions have been included with your fabric, but a few points have been changed slightly and it won't make a difference which directions you use*

The "block"
finished size: 8.5" x between 40" and 83"

1. Take your linen (8" x 46") and cut it in half so that you have 2 pieces that are 8" x 23" (3 total).
2. Take one of the 8" x 23" pieces and cut it in half so that you now have 2 pieces that are 4" x 23"
* We are going to be working with 2 sets: tall color pieces (that use the linen from step 2) and short color pieces (that use the linen from step 1).
3. Look at your cotton fabrics. You may want to set some aside to be tall and take others to be shorter pieces (cut them as you see fit). The ones I sent you are between 1.5"-3" wide and 4"-7" tall.

Lovely Linen Tutorial

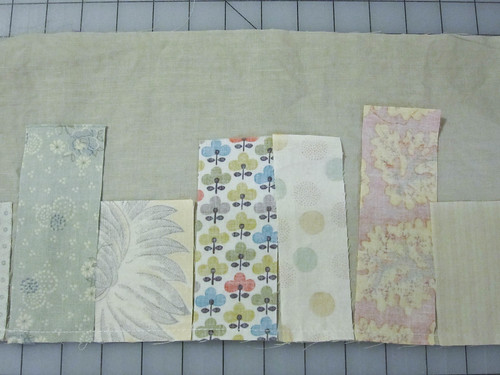
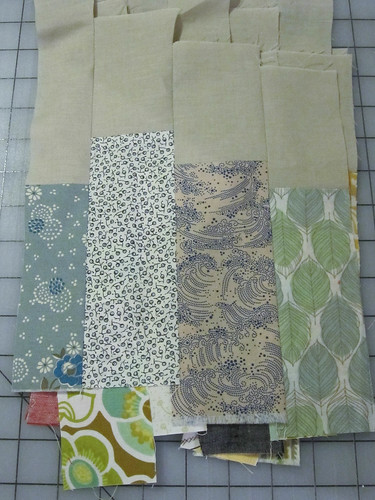
4. Take the shorter pieces (under 6" tall) and sew them to the 8" linen in a string piecing method (see picture). It's best if your pieces are touching, but not overlapping.
Lovely Linen Tutorial-2

5. Repeat with your taller pieces (6" or more) and the 4" tall linen.
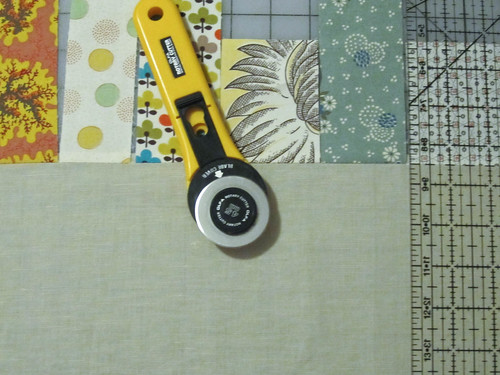
6. Press seams toward cotton. Use your rotary cutter & ruler to trim them apart. 
Lovely Linen Tutorial-3

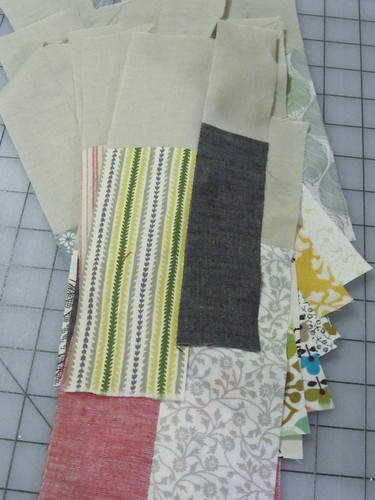
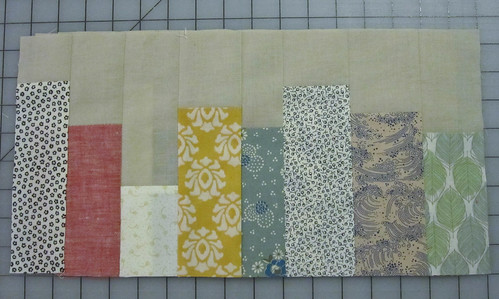
7. Now take any 2 (perhaps a tall & short?) and place them right sides together. You're going to want to make sure that the horizontal seams DO NOT line up. Sew. Press seam however you like. Repeat...
Lovely Linen Tutorial-4

8. Sew together 2 pairs. Press seam. Repeat...
Lovely Linen Tutorial-5

* Once you have about 8 pieces sewn together (about 18" wide) you're going to trim it to 8.5" tall. It's easier to trim now than at the end. 
Lovely Linen Tutorial-6

10. Sew together these trimmed blocks, this time making sure that the top & bottom are aligned. 
11. Repeat until you have a row! Or until you are burned out! :) I made it to about 50" wide in just over an hour (with documentation).

Lovely Linen Block

I am very happy with how this is looking! I made a collage in Photoshop, but I'm not going to share it because I want to final quilt to be a surprise!

Siggy block
So this may sound strange: I want you to sign one of the cotton fabric pieces in your row. It can have a print or be a solid. Be one of my fabrics or yours.  Big or small.

Thursday, January 27, 2011

Butterflies for Jodi


Butterflies for Jodi
Originally uploaded by nkiblueeyes
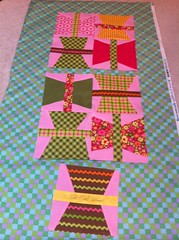
Re-done! I had my butterflies assembled the wrong way... Got some more pink linen & finished up!